 |
| Yes, I Think RoadAbode's Captain did it! Co-pilot saves the day! |
So where was it coming from?
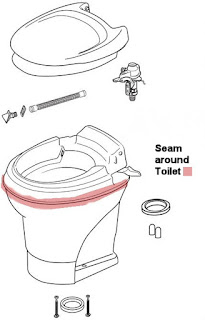
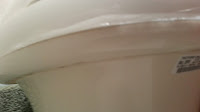
 We could not see any drips from the inlet in the back of the toilet, and the pressure (we always use a regulator) was not abnormally high. Holding the handle and letting the water run while flushing, Amy discovered the issue. A seam that connects the bottom pedestal to the area right under the seat had small droplets of water leaking out. Behind the seam is where the water flows to get the "swirling" action to flush down the toilets contents. After over ten years (and probably my big butt) of use, it no longer was a water tight seam.
We might be able to fix this!
Though we had a tube of window caulk on-board, We decided to stop somewhere along the way and pickup some Silicone sealant - like what they use to seal aquariums. I've used this in the past for sealing cracks and such - that are not under pressure. Fortunately, the way the toilet is built the channel that the water is traveling through behind the cracked seal is not under pressure. The channel just directs the water around the upper edge of the bowl. Using the silicone should work.
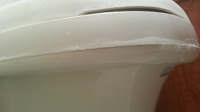
While underway, we instructed the girls that they could use the toilet, but we would keep the water pump off. To flush, they would just use a filled water bottle rather than the flush valve. on the toilet. Amy scouted out a Walmart that was not too far off our travels in Delaware. Once there, the girls found the exact silicone sealant we were looking for in a nice, small tube - perfect for the job. Amy made sure the seam was dry, and liberally applied the sealant to the toilet. According to instructions, it had to cure for 24 hours. So we let it do it's thing until the next day. (probably a little less that 24 hours) It was no longer tacky and the seam was completely covered and enclosed in the silicone. We put on the water and tested with the valve. It worked! For the rest of our stay we had no water issues from the toilet. Will be using for our upcoming guys trip to Gettysburg. We'll see how it holds up. So glad and blessed that I have a wife who is a quick thinker and can handle a little stress while out in RoadAbode.
 |
| silicone applied |
We are looking at newer toilets, and may purchase one in the near future. If you have any experience with a toilet you like of don't like, we'd love to learn from you. Write in the comments section below!
Happy travels!


No comments:
Post a Comment